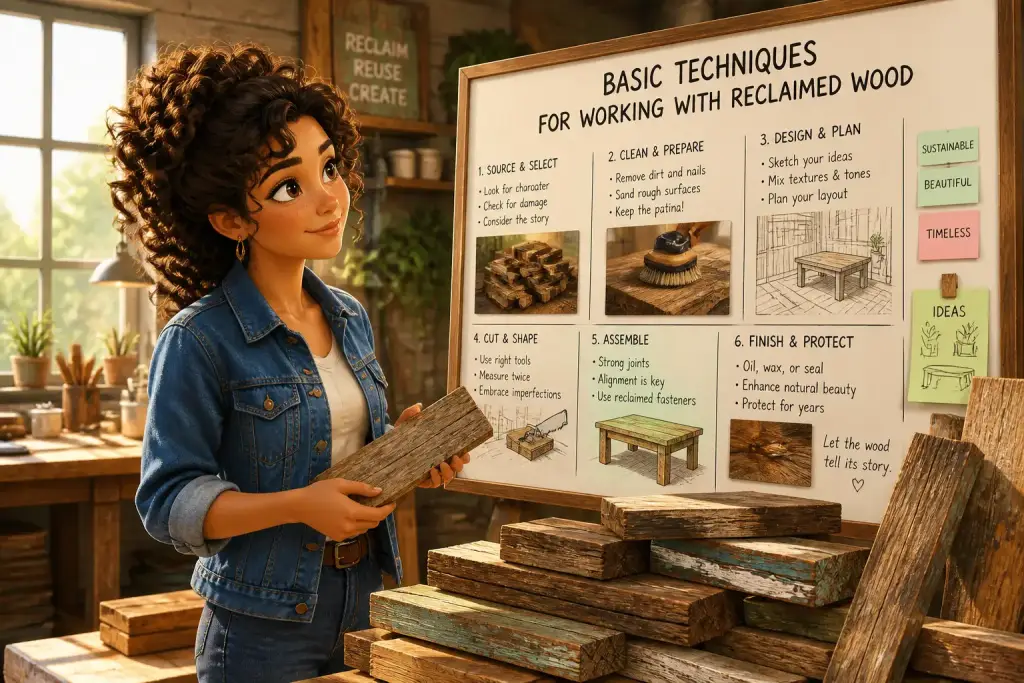










Sanding and finishing reclaimed materials can breathe new life into old wood, allowing it to shine in modern projects. Whether you’re planning to create furniture, decorative pieces, or home accents, mastering these techniques is vital. This guide offers a step-by-step approach to ensure you achieve a professional finish on your reclaimed materials. The right tools and methods can transform worn wood into a stunning feature in your home.
- Proper sanding removes imperfections and smooths surfaces effectively.
- Finishing products protect wood and enhance its natural beauty.
- Techniques vary based on material type and intended use.
Table of Contents
- Gathering the Right Tools and Materials
- Preparing Your Reclaimed Materials
- Mastering the Sanding Process
- Choosing the Right Finish for Your Project
- Applying Stains and Sealants
- Finishing Touches for a Professional Look
- Practical Applications for Reclaimed Finishes
- Transforming Your Workspace with Reclaimed Materials
Gathering the Right Tools and Materials
Before starting any project, gathering the necessary tools and materials is essential for success. The right equipment can make the sanding and finishing process smoother and more efficient. Here are some key items you will need:
- Sanding tools: This includes hand sanders, sanding blocks, and electric sanders for larger surfaces.
- Sanding paper: Choose a variety of grits, such as coarse (60-80 grit), medium (120-150 grit), and fine (220 grit) for a smooth finish.
- Finishing products: Select high-quality stains, sealants, or finishes that suit your project needs.
- Protective gear: Always wear safety goggles, a dust mask, and gloves to protect yourself from dust and chemicals.
Once you have gathered your tools, ensure your workspace is clean and organized. A clutter-free area allows for better focus and efficiency. Proper lighting is also important, as it helps you see imperfections during the sanding process.
Preparing Your Reclaimed Materials
Preparation is the first step in achieving a beautiful finish. Reclaimed materials often come with imperfections such as old paint, dirt, or rough edges that must be addressed. Start by thoroughly cleaning the wood to remove any debris or contaminants. Here are some effective methods:
Cleaning Techniques
- Wash with soap: Use warm soapy water and a sponge to clean the surface, then dry it completely.
- Remove old paint: If there is old paint, consider using a paint stripper or a heat gun to carefully remove it.
- Inspect and repair: Check for cracks or loose pieces. Fill in gaps with wood filler to create a smooth surface.
After cleaning, allow the wood to dry completely. Moisture can affect the sanding and finishing process, leading to uneven surfaces or peeling finishes. Once the wood is dry, you can begin sanding.
Mastering the Sanding Process
Sanding is a crucial step in the process of finishing reclaimed materials. It not only removes old finishes and imperfections but also prepares the surface for staining or sealing. The key to effective sanding is to work gradually through the grits. Start with coarser grits and progress to finer ones. Here’s how to approach it:
Sanding Steps
- Begin with coarse grit: Start with 60-80 grit sandpaper to remove rough spots and old finishes.
- Move to medium grit: Switch to 120-150 grit paper to smooth the surface further.
- Finish with fine grit: Use 220 grit paper for a smooth finish that is ready for staining or sealing.
Always sand in the direction of the wood grain. This helps avoid scratches and gives the wood a polished appearance. After each sanding pass, clean the dust off the surface with a vacuum or a damp cloth.
Choosing the Right Finish for Your Project
The type of finish you choose for your reclaimed materials can greatly impact the final look and durability. Different finishes offer varying levels of protection and aesthetic appeal. Here are some common options:
- Oil-based finishes: These penetrate deeply into the wood, providing excellent protection and a warm, rich color.
- Water-based finishes: These dry quickly and are easy to clean up. They offer a clear finish that does not alter the wood’s color significantly.
- Varnishes: Varnishes provide a hard, protective layer and can be glossy or matte, depending on your preference.
Test your chosen finish on a small, inconspicuous area of the wood first. This allows you to see how the wood reacts and whether you like the final color and sheen. Once satisfied, apply the finish according to the manufacturer’s instructions.
Always sand with the grain of the wood to avoid scratches and ensure a smooth surface.
Applying Stains and Sealants
Staining reclaimed materials can enhance their natural beauty and highlight unique features. When applying stains or sealants, it is important to follow a few best practices to ensure even coverage and a beautiful finish. Here’s how:
Staining Steps
- Prepare the stain: Stir the stain well to mix any pigments that may have settled at the bottom.
- Use a brush or cloth: Apply the stain with a clean brush or cloth, working in the direction of the grain.
- Wipe off excess: After a few minutes, wipe off any excess stain with a clean cloth to avoid blotchiness.
- Let it dry: Allow the stain to dry completely according to the manufacturer’s instructions before applying a sealant.
After staining, a sealant is essential for protecting the wood from moisture and wear. Apply the sealant in thin coats, allowing each coat to dry before adding the next. This helps build a strong protective layer.
Finishing Touches for a Professional Look
Achieving a professional look goes beyond simply sanding and finishing. The details matter. Here are some finishing touches to consider for your reclaimed materials:
- Final sanding: After the first coat of sealant dries, lightly sand the surface with fine grit sandpaper. This helps the next coat adhere better.
- Add details: Consider adding hardware, such as handles or hinges, that complements the reclaimed wood’s style.
- Care and maintenance: Educate yourself on how to care for finished reclaimed materials to keep them looking their best over time.
By paying attention to these small details, you can ensure that your reclaimed materials not only look great but also stand the test of time.
Practical Applications for Reclaimed Finishes
The beauty of reclaimed materials lies in their versatility. You can use these techniques on various projects, from furniture to decorative art. Here are some practical applications where these sanding and finishing techniques shine:
- Furniture projects: Create stunning tables, chairs, or shelves that tell a story through their unique finish.
- Home décor: Craft beautiful wall art or signage by using reclaimed wood finishes that reflect your personal style.
- Renovation projects: Incorporate reclaimed materials into home renovations for an eco-friendly and stylish touch.
These applications highlight the endless possibilities when working with reclaimed materials. As you practice and refine your techniques, your confidence will grow, allowing for more creative projects.
Transforming Your Workspace with Reclaimed Materials
Your workspace can benefit immensely from the beauty and character of reclaimed materials. Not only do they add aesthetic appeal, but they also create a unique environment that inspires creativity. Here are some ideas to consider:
- Custom workbenches: Build a sturdy workbench using reclaimed wood that provides both functionality and style.
- Shelving units: Create open shelves to display tools, materials, or finished projects, making a personal statement in your workspace.
- Decorative accents: Add reclaimed wood accents such as picture frames or wall art to enhance the overall look of your workspace.
By incorporating reclaimed materials into your workspace, you not only elevate its look but also embrace sustainability. This conscious choice reflects a commitment to reusing and repurposing materials, making your creative space both beautiful and environmentally friendly.